Implementing Facebook JavaScript SDK Login Frontend + Rails API Backend
I want to share my experience building Yijing-Ball Z, a Single Page Application (SPA) with a Vanilla JavaScript Frontend and Rails API backend. More specifically, I’m going to share how I was able to implement a login interface frontend through FB authentication! Let’s do this.

One of my main challenges building Yijing-Ball Z (a Yijing / I Ching oracle app which draws aesthetic inspiration from the Japanese anime Dragon Ball) was to keep everything single-page. Since the frontend was envisioned to be pure vanilla JS and the backend as a Rails API only, I stumbled into a problem when I had the (marvelous) idea to add users that could save their casted readings.
In doing this. I had some routes to take. The easiest was implementing Devise, but this would have broken my SPA constraints and the backend would have lost its API-only structure (by now having to handle authentication instead of just responding to data requests). The most tedious route, would have involved recreating and handling users through pure JS, and having to deal with passwords, and other sensitive info. Yuck!
The third option: handling authentication through a third party such as Facebook. With this I could keep SPA simpleness and leaving the backend pure with its intended purpose.
Set Up
Before starting up. Let’s setup our Facebook Developers account. There are many tutorials out there on how to get started. For our purposes let’s ensure that:
- Create New App. Save your APP ID. You will use this APP ID later.

2. Setup Facebook Login Product.

3. On Basic Settings make sure you add the frontend URL (it could be localhost if you’re on local). Note: if testing on local, you will need to set up HTTPS, see point #5 below. Facebook only allows HTTPS.

4. On Facebook Login settings, also add your site or localhost as a Valid OAuth Redirect URI.

5. Note: If you’re on local make sure you run a HTTPS server frontend to be able to communicate through Facebook. There are many ways to setup a server. I’m going to show you how you can do it through Python. On root create a file named simple-https-server.py. Add the following code to the file:
# taken from http://www.piware.de/2011/01/creating-an-https-server-in-python/# generate server.xml with the following command:# openssl req -new -x509 -keyout server.pem -out server.pem -days 365 -nodes# run as follows:# python simple-https-server.py# then in your browser, visit:# https://localhost:4443import BaseHTTPServer, SimpleHTTPServerimport sslhttpd = BaseHTTPServer.HTTPServer(('localhost', 4443), SimpleHTTPServer.SimpleHTTPRequestHandler)httpd.socket = ssl.wrap_socket (httpd.socket, certfile='./server.pem', server_side=True)httpd.serve_forever()
Follow the comments to generate your server. Pretty much you can run the following command and have a frontend server up and running as HTTPS on https://localhost:4443.
python simple-https-server.pyFacebook JavaScript SDK
We are now ready to implement Facebook Login in our vanilla JS app. As you go through the next steps make sure you read the documentation here, JavaScript SDK Examples and Manual Login flow (if you’re planning for iOS devices to login to your app in the future). Also you can refer to Yijing-Ball Z Github for my working code.
FB documentation offers a great starting point and it even gives you a full implementation example.
Let’s build on that, let’s create FBSDK.js file, then let’s wrap the following code in a DOMContentLoaded event listener.
document.addEventListener("DOMContentLoaded", function() {// <!-- FB SDK LOAD START -->window.fbAsyncInit = function() {FB.init({appId : 'yourAPPID',cookie : true,xfbml : true,version : 'v5.0'});FB.AppEvents.logPageView();};(function(d, s, id){var js, fjs = d.getElementsByTagName(s)[0];if (d.getElementById(id)) {return;}js = d.createElement(s); js.id = id;js.src = "https://connect.facebook.net/en_US/sdk.js";fjs.parentNode.insertBefore(js, fjs);}(document, 'script', 'facebook-jssdk'));// <!-- FB SDK LOAD END -->});
This boilerplate code is pretty standard and loads everything up so that you can communicate with Facebook and have users log in to your app!
Note: The majority of the action happens in the window.fbAsyncInit function and right after FB.AppEvents.logPageView(). To avoid cluttering it up, we will build some helper functions that we will then add right after SDK loads.
As you saw above, we are loading FB SDK every time our app starts. Now the first thing we need to do is check whether our user has been logged in and/or whether the logged-in interaction with Facebook was successful. To do this lets create a checkLoginState() function right after of our boilerplate code and add the following:
function checkLoginState() { FB.getLoginStatus(function(response) { statusChangeCallback(response); });}
Here we are calling FB SDK’s FB.getLoginStatus method and then passing out the response to another function that we named statusChangeCallback(). With that in mind let’s go ahead and build that function next.
function statusChangeCallback(response) {   console.log(response);   if (response.status === ‘connected’) {      console.log("logged in!")
      testAPI();   } else {      console.log(‘please login’)   }}
This little function has a simple conditional that if is connected will run yet another function that will handle a connected state. The first time you run it, you should see ‘please login’ output to your console (since you haven’t authenticated through FB).
In order to test your app, we need to call checkLoginState() in the window.fbAsyncInit and right after FB.AppEvents.logPageView(). So it will look like this:
// <!-- FB SDK LOAD START -->window.fbAsyncInit = function() {FB.init({appId : 'yourAPPID',cookie : true,xfbml : true,version : 'v5.0'}); FB.AppEvents.logPageView(); checkLoginState()};
Logging in with Facebook’s SDK
Now we’re ready to login! The easiest way will be to add the FB Login button as explained on the documentation.
Feel free to add the following code anywhere on your frontend that you want users to login (I added mine to the navbar):
<fb:login-button scope="public_profile,email"></fb:login-button>
If everything goes fine you should see your FB Login button. Go ahead and click on it.

Once you logged in what happens? The console logs ‘logged in!’. Sweet right? True but we actually aren’t entirely logged-in through our Rails API. Let’s do that next.
To really ‘log in’ our user we need to access our Rails API database and either create or find our user. In order to do this we will create two classes that will communicate with our backend one for User and the other for an ApiAdapter. Let’s go ahead and the .js files for both. The code should be as simple as the following.
User.js
class User { constructor(name, uid, id){ this.name = name this.uid = uid this.id = id }}
ApiAdapter.js
class ApiAdapter { constructor() { this.baseUrl = 'Copy and paste your Rails API url. E.g. http://localhost:3000/' } userPost(attributes){ const url = `${this.baseUrl}/users` const user = { attributes, } return fetch(url, { method: 'POST', headers: { 'content-type': 'application/json', }, body: JSON.stringify({ user }), }).then(res => res.json()).catch(error => { console.log(error.message) }) }
Note 1: Our userPost() method is running a very basic AJAX request on our users create route. The method will be POST so it will be handled by your create action in your UsersController on Rails.
Note 2: I’m separating concerns here. Don’t forget to include any JS files you create to ensure that when you’re ready to instantiate those classes everything works well.
Now that we have our classes setup, lets go ahead build our testAPI() function that was called on statusChangeCallback().
const user = new User()const adapter = new ApiAdapter()function testAPI() { console.log('Welcome! Fetching your information.... '); FB.api('/me', function(response) { user.name = response.name user.uid = response.id const userAttrs = {} userAttrs["name"] = user.name userAttrs["uid"] = user.uid adapter.userPost(userAttrs).then(res => loginUser(user.name, res.id)) }); }
That seems like a lot. Lets take a deep breath and stretch a bit.
Ok good.
Assuming your Rails-API routes are setup correctly. You can now go to your UsersController and define your create action as this:
def create user = User.find_or_initialize_by(uid: user_params["attributes"]["uid"]) if !!user.id render json: user, status: 200 else user.name = user_params["attributes"]["name"] user.save render json: user, status: 200 end private def user_params params.require(:user).permit(attributes: {}) endend
Note: We assume you have some Rails background and can generate tables and migrations. There are plenty of tutorials out there. For this tutorial, we only require you to have an ‘uid’ and ‘name’ text attributes for User.
Note 2: We are finding or initializing our user by the uid attribute, this is what we get from Facebook and is the unique identifier. On our user params we are requiring an attributes hash that we created when we did our AJAX fetch request in our ApiAdapter class.
Before we test our app, let’s go back and deal with the loginUser() that we defined right after our fetch request is resolved. Our loginUser() function could look like many things. What I did was creating a logout button and attaching the user.id I got from my Rails API. So you can add and empty div with a logoutbtn id and add the following code:
function loginUser(username, userid){document.getElementById("logbtn").innerHTML = `<button type="button" class="logout" id="${userid} onclick="logout()">Logout</button>`console.log(`Welcome ${username}!`)//We will uncomment this line soon
//addScript(logoutScript)}
Now you’re ready to test your app! If everything goes well you should see your newly created logout button and ‘Welcome userName’ logged to your console!

Now if you go back and access your Rails API users endpoint you should see your newly created user! E.g.
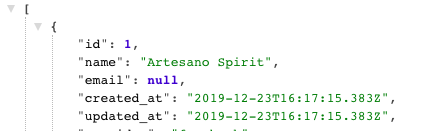
Did it blow your brains?
Logging Out
The documentation has some working examples of how you can logout users. Lets uncomment the addScript() function line in loginUser() and work on the function. Our addScript() function should look like this:
function addScript(js){ const script = document.createElement('script'); script.type = 'text/javascript'; script.text = js document.body.appendChild(script);}
Maybe you saw how in the previously commented-out function we were passing out logoutScript variable, lets build that too:
const logoutScript = `function logout() { document.querySelector(".logout").addEventListener('click', FB.logout(function(response) { location.reload();}));} `
This will be a very sweet way to log out our user by calling SDK’s FB.logout function and then rerunning our script. It is true that location.reload() will reload our page but since we are dynamically adding our script to our body this is the fastest route to go (we will not be able to call checkLoginState() as it will not be recognized).
Test your app again. If all goes well right after you click on the logout button your page should refresh and the checkLoginState() will be called so that our FB login button will reappear and this will mean we have logged out!
Conclusion
Now that you have user authentication through JS frontend you can enjoy all the benefits of it. While this is just a starting point for a more robust authentication frontend with JavaScript, from here the possibilities are endless.
In my own experience building Yijing-Ball Z , I used Facebook JS SDK authentication to allow users be able to save their casted hexagram readings.


Not bad right?